Cable Organizer Tray
Under Desk Cable Management Tray
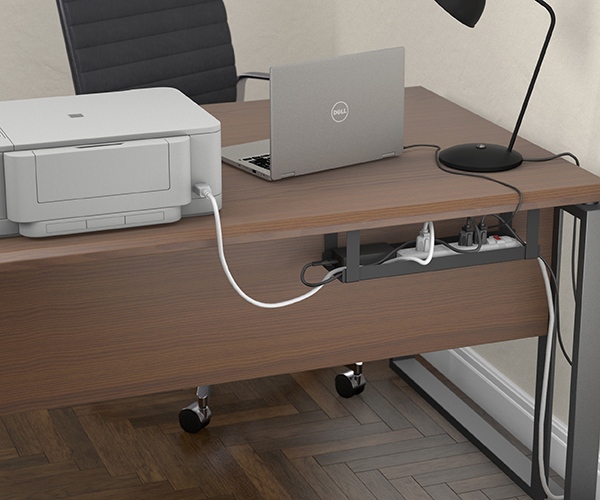
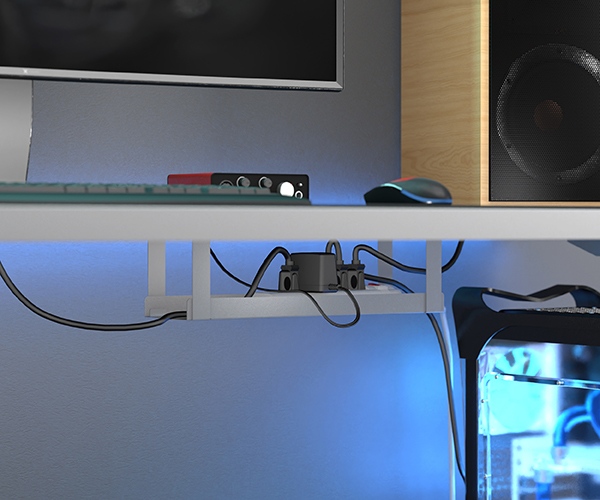
For home offices and workplace desks, around AV and IT equipment, and gaming set ups, Cable Organizer Tray enables power strips and cables to be accessible, while keeping floors and desktops uncluttered, cable-safe and easy-to-clean around.
Features
- Quick and easy assembly
- Robust steel construction
- Easy screw-fix or self-adhesive fitting options
- Made in UK
Dimensions
15.75" (L) x 4.13" (W) x 5.91" (H)
Dimensions accommodate popular power strip outlets and plug-tops.
It can be used alongside other Cable Organizer Trays, if longer runs are preferred!
Popular Applications
Great for use in commercial or home offices, reclaiming desk and floor space for a neat & tidy workspace.
Improve the look of your set-up, by organizing power strips and cable clutter.
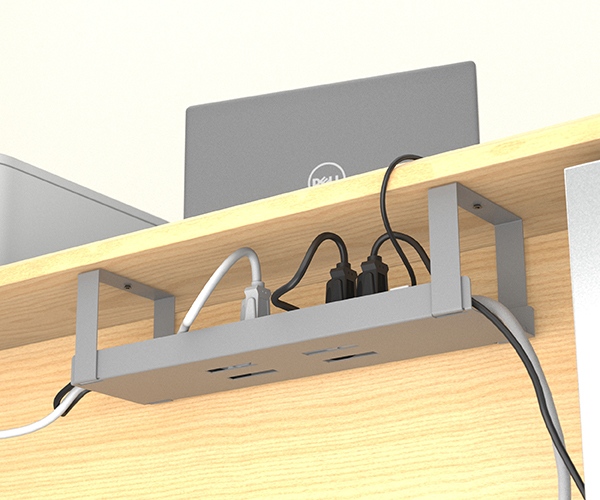
Color Options
Cable Organizer Tray available in Black & Gray.
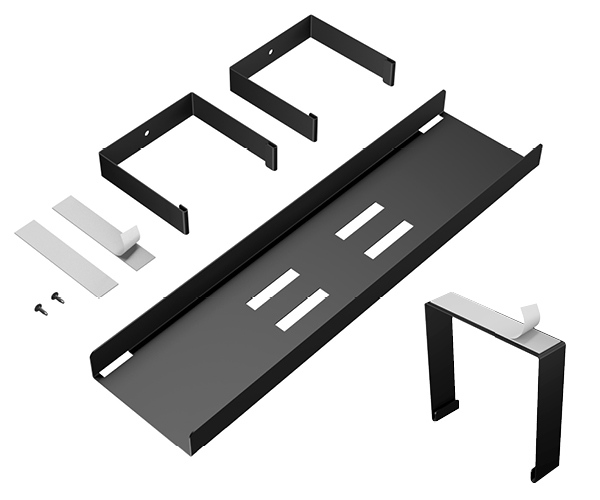
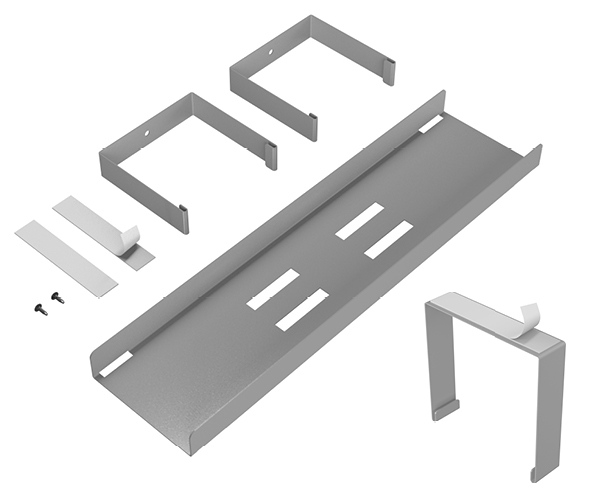
Installation Steps
Easy screw-fix or self-adhesive fitting options depending on user preference. Each Cable Tray is supplied with an easy-to-use installation template.
Self-Adhesive, peel & stick Installation Steps
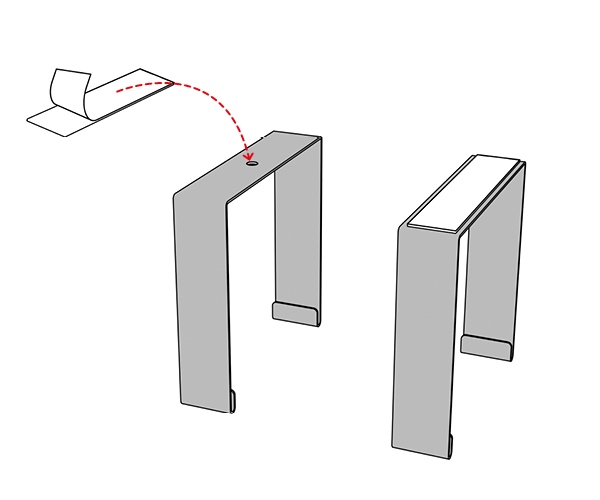
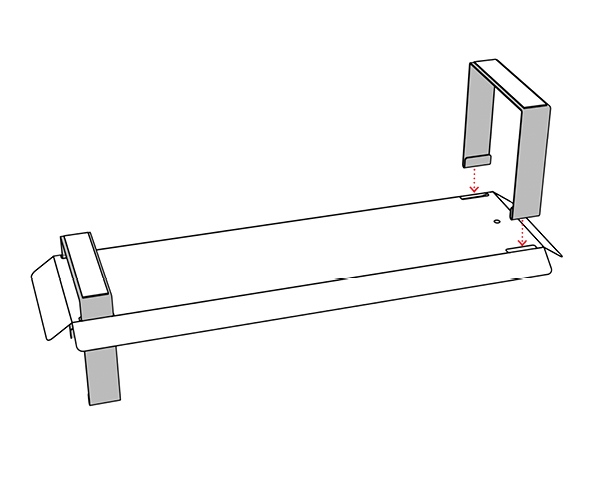
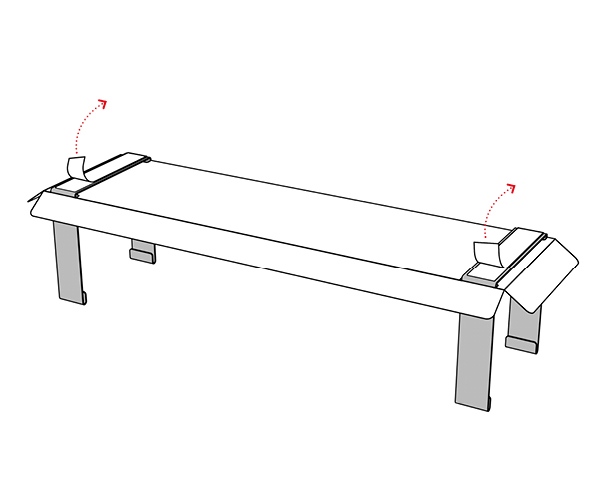
Step 1. Attach the self-adhesive strips to top-side of the 2x brackets.
Step 2. Locate both brackets via the slots in the template guide.
Step 3. Now the brackets are ready to affix to surface.
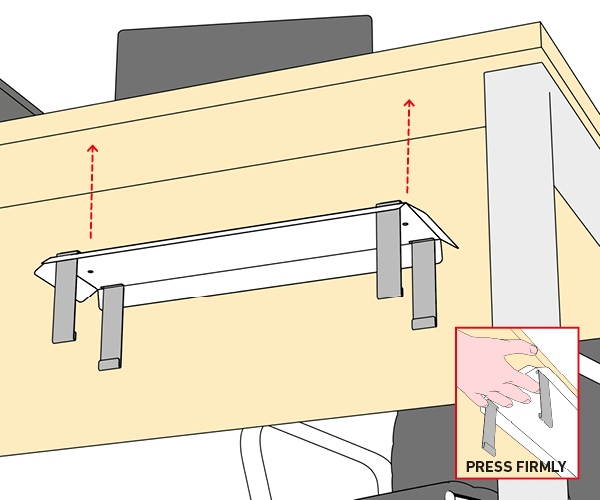
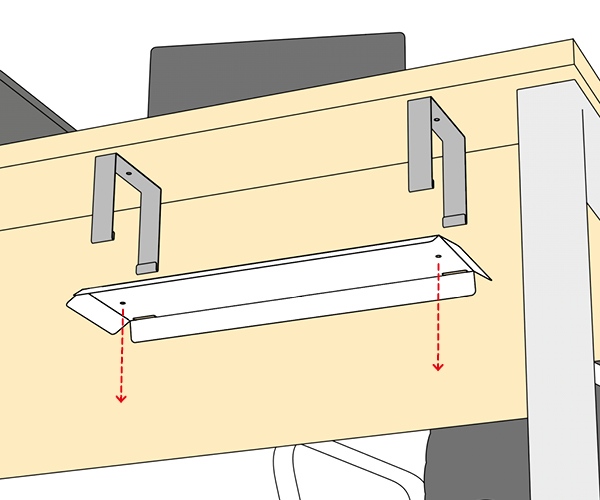
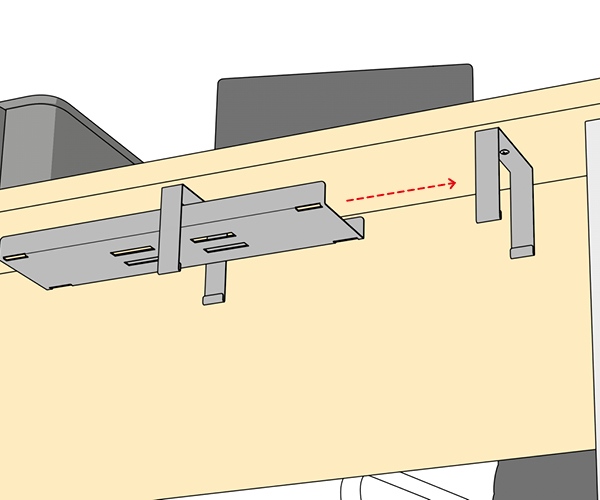
Step 4. Attach the brackets to the underside of your desk or table. Ensure surface is clean and dry.
Step 5. Remove the template.
Step 6. Move the Cable Tray, to be ready for attaching to hooks inside the brackets.
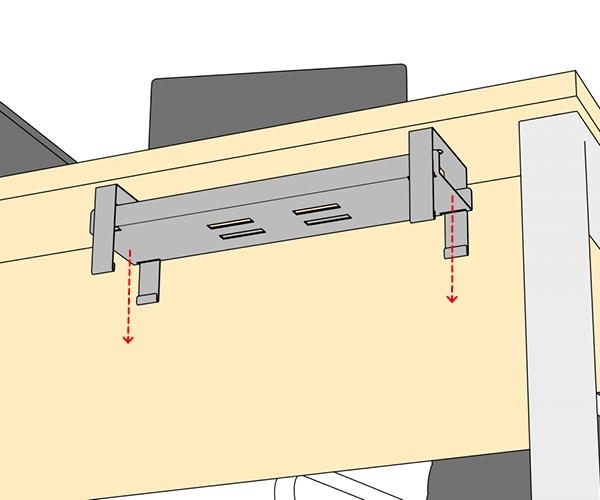
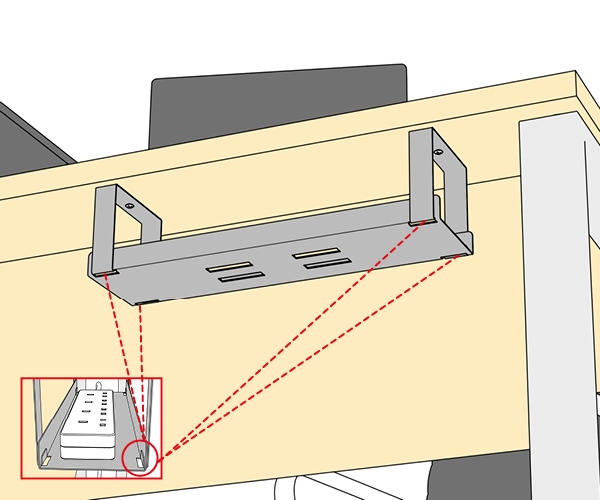
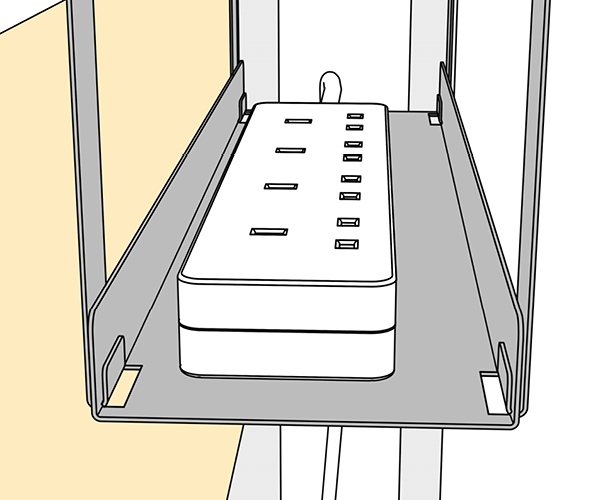
Step 7. Align the slots on tray, to the hooks on brackets.
Step 8. Attach Cable Organizer Tray base to hooks on brackets.
Step 9. Add power strip to base of tray.
Drill & Screw-Fix Installation Steps
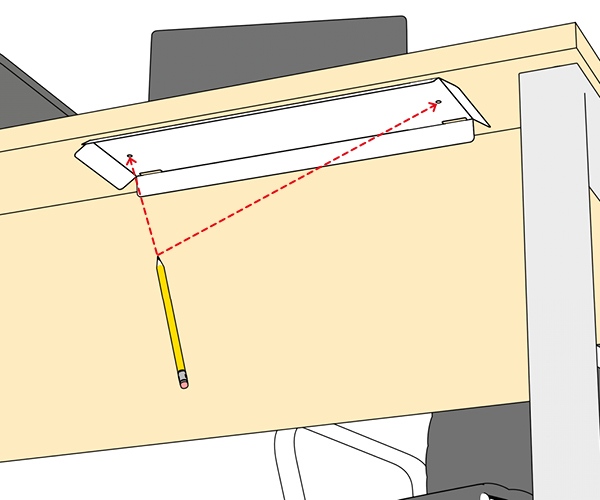
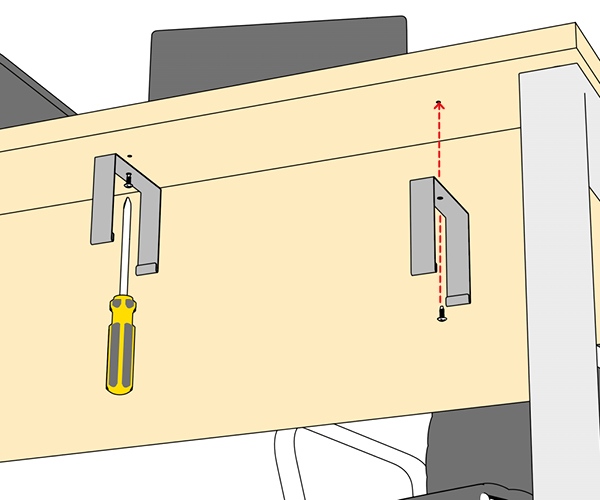
Step 1. Use the template holes, to mark the screw-locations where the brackets will be located.
Step 2. Use screws provided to fix through hole in each bracket, to secure brackets to desk or table.
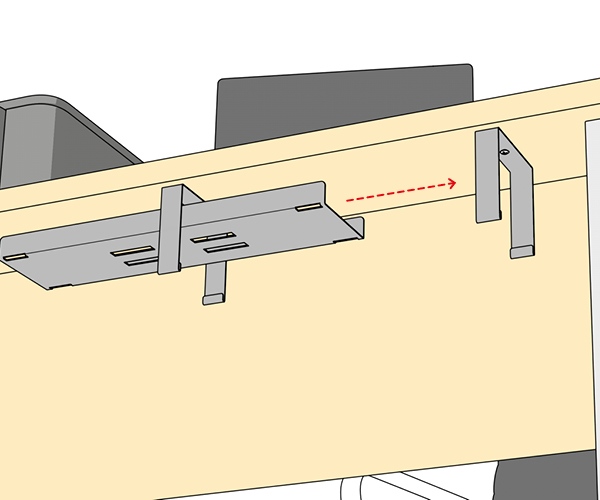
Step 3. Move the Cable Tray, to be ready for attaching to hooks inside the brackets.
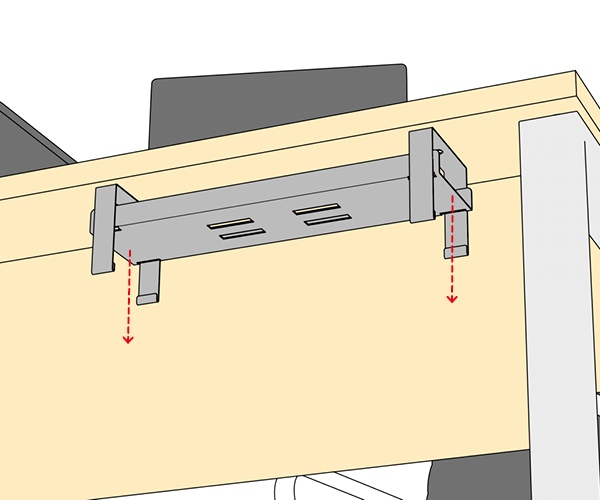
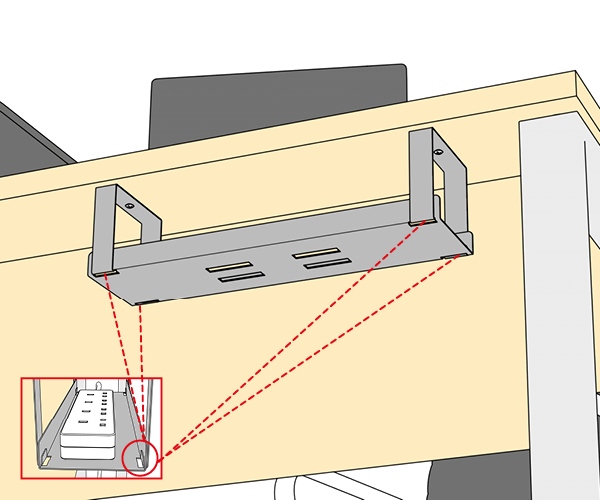
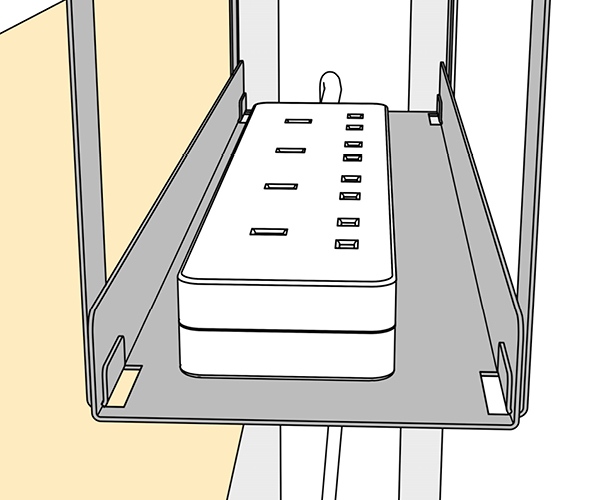
Step 4. Align the slots on Cable Tray to the hooks on the brackets.
Step 5. Attach Cable Organizer Tray base to hooks on brackets.
Step 6. Add extension block to base of tray.


